
Cloud is one of the trending technologies today. However, creating functions in the cloud has never been an easy task. Nevertheless, the union of AWS Lambda functions and AWS SQS has trimmed down this daunting task to a great extent. Talking about the cloud, this whole infrastructure can be fully automated. Customers can save money by using lambda, which is serverless, and Function as a Service. As AWS Lambda is a serverless service, customers can use it instead of provisioning an AWS EC2 instance.
So, why do we need a lambda function to configure the S3 bucket in AWS Cloud?
The most important reason to talk on this topic is the unavailability of precise and adequate information.
The major challenge was the lack of source to integrate S3 and SQS as it was very new to integrate S3, lambda, and SQS. There were documents available, but it didn’t help much.
So let’s get started.
Step1: First, let’s make a bucket.
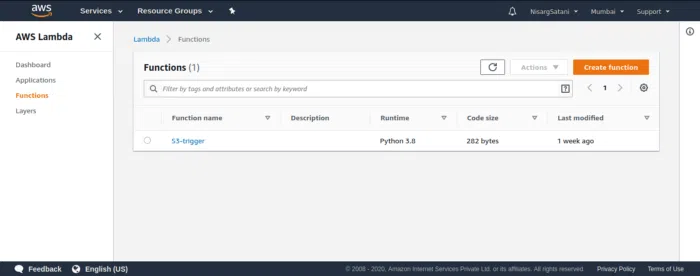
Step2: Now go to Lambda function in services, and click on create a function. The following image shall provide a better picture of the scenario.
Step 3: It will show you the following page
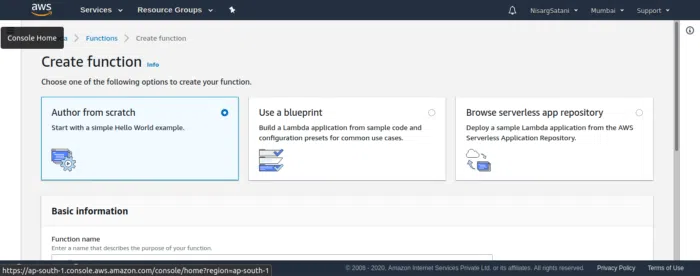
In this step, select Author from scratch, then move down where you will see the following:
- Function Name
- Runtime
- Permissions
- Choose or create an execution role
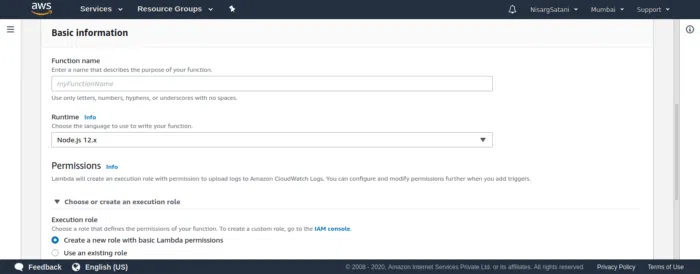
Here give your function a name of your choice and then select a language under Runtime, preferably python.
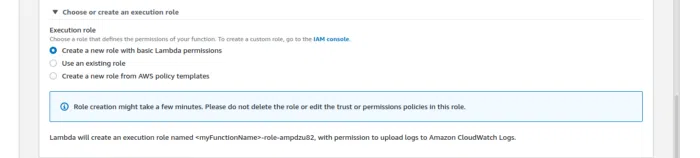
Then under Permissions, Choose or create an execution role. Here you will get three options, as shown below.
- Create a new role with basic lambda permissions
- Use an existing role
- Create a new role from AWS policy templates.
Step 4: Now go to the IAM dashboard shown in the following picture.
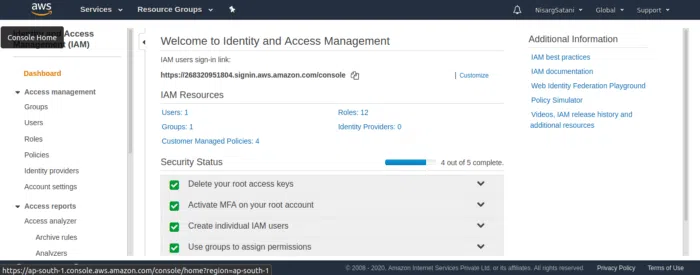
Here select Roles under Access management. After that, create a role, as shown below.

The create role will ask you to choose the trusted entity where you should select lambda.
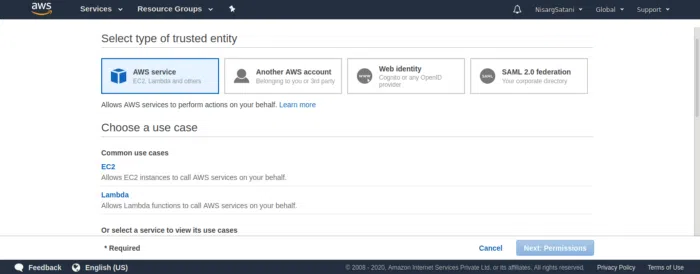
Then click next which will ask for permissions.
Then click next which will ask for permissions.
Allow for the following policies for the services to be in sync.

- SQS Full access to writing the message in the message queue.
- S3 Full access to get the notification in lambda, which will give to SQS.
- CloudWatch Full access to watch the logs; by default, logs of lambda are shown in
- CloudWatch, but when these are integrated, it is necessary to attach this policy.
- AWSLambdaSQSQueueExecutionRole to send data from lambda to SQS.
Once the policies are assigned, the next step is to assign tags. However, tagging can be optional in some scenarios. When done, move ahead and name the role as given below:
The name of the role given here is s3_lambda_sqs.
After this, click Create a role, and the role is created.
Step 5: Go back to the lambda dashboard and select an existing role made in IAM.
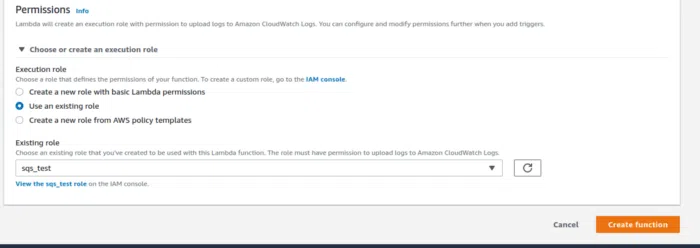
As shown below, after selecting an existing role, a dropdown box will appear and choose the role created in IAM.
After that, Create a function.
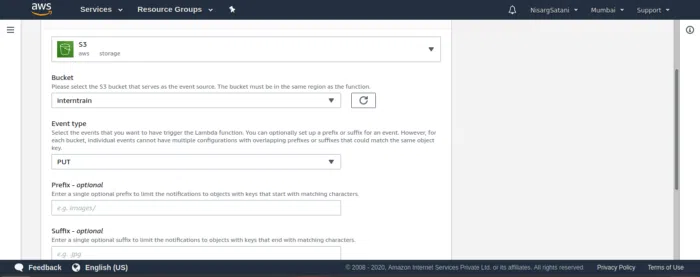
Step 6: It will show like this as shown below, function name under Configuration under Designer dropdown will show these configurations listed below.
- Bucket – select the bucket name which you want to configure
- Event type – PUT
- Profile (optional)
- Suffix (optional)
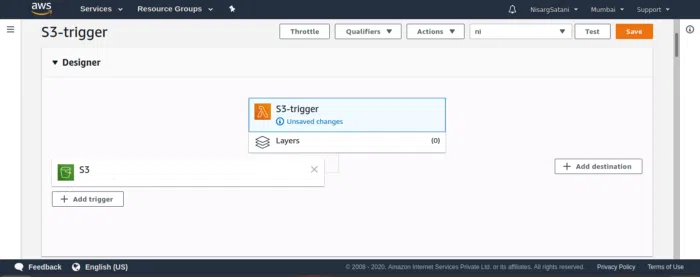
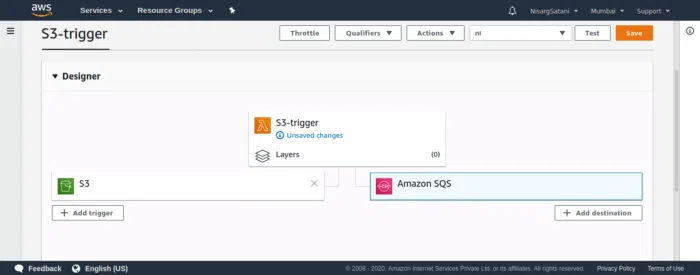
Add the trigger by clicking on the button on the left, which you can see in the above picture.
In the add trigger, give S3 and choose the created bucket name under the event type dropdown box. This means that whenever an object is uploaded to the object, it will trigger the lambda function.
Then add these triggers to the lambda function. After adding the triggers to the function, the dashboard will look like this.
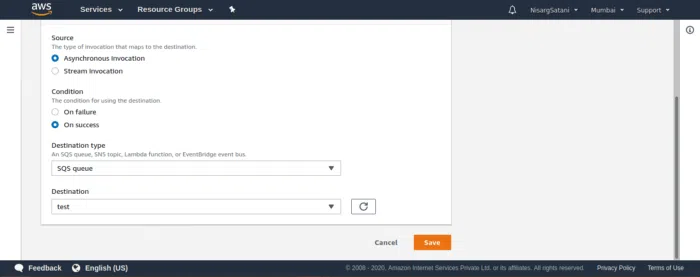
Step 7: Add the destination, which is SQS.
- For that, click on Add destination, which will configure the destination.
- Select source as Asynchronous invocation.
- Select the condition on which lambda will throw it to destination, so select On success.
- After that, select Destination type; under dropdown, select SQS queue.
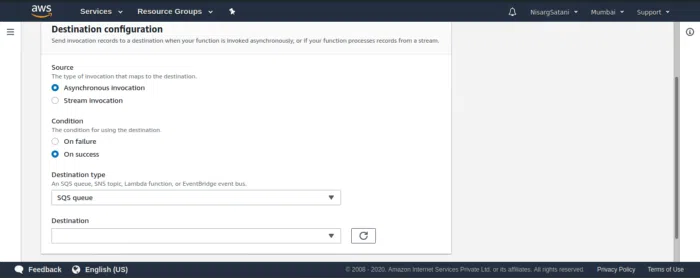
Once you have added the destination, select destination; navigate to the SQS queue dashboard.
Make a queue for receiving messages from lambda.
Click on Create New queue.
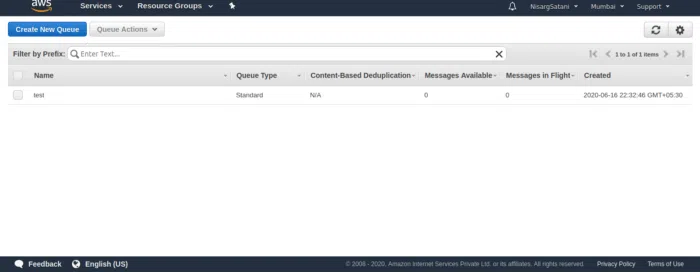
Upon creating the queue, assign a name to the queue, and keep the queue type as Standard queue.
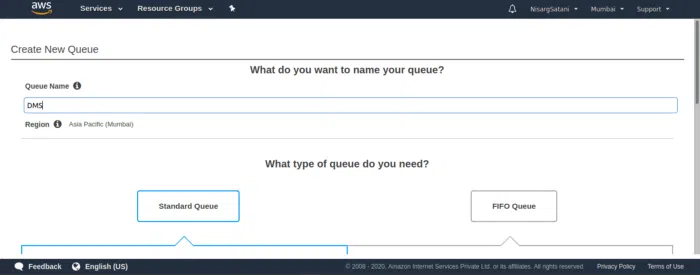
Scroll down and click on Quick Create queue, and the queue is ready for receiving messages.
Go back to the lambda dashboard, and in the Destination Selection, select the name of the queue created.
Now save the destination, and the lambda dashboard will look similar to the one mentioned below.
Now select the lambda function and scroll down where there will be a Function code window.
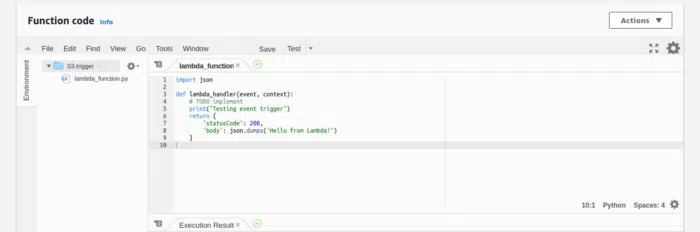
Any changes can be made in the return part of the code. Now Save and Test the function.
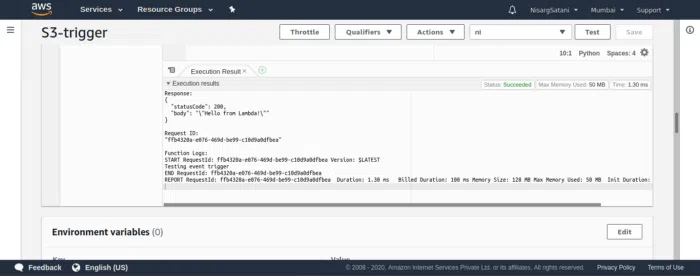
Below it will show the execution result as shown below.
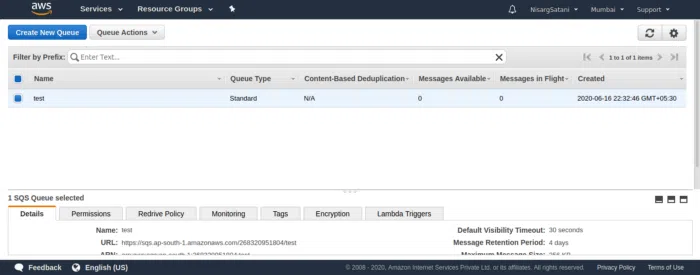
Step 8: Now, add a file to the S3 bucket and check the SQS queue for messages.
For doing that, upload a file to the S3 bucket, navigate to the SQS dashboard, and refresh it. This will show you the file uploaded and time stamp, file name, the date on which the file was uploaded.
Go to Queue Actions dropdown and select View/Delete messages and start polling.
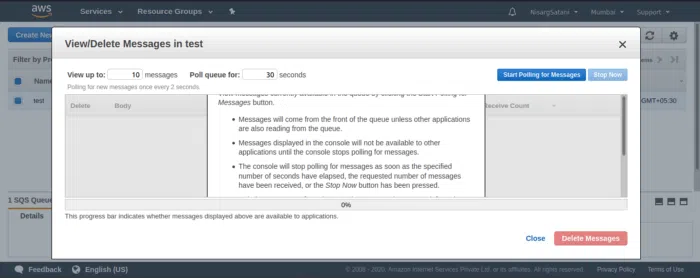
After that, it will show you the message as shown below.
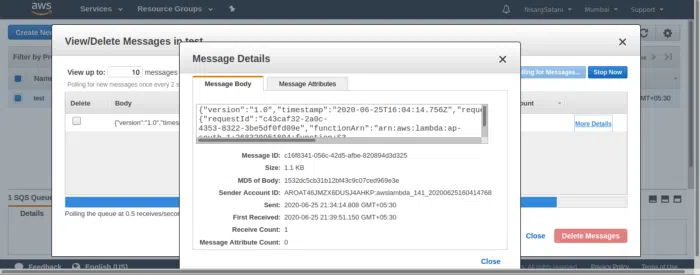
This is how you configure S3-Lambda-SQS.
Using these ten steps, you can easily configure your S3 bucket with the help of the lambda function. If you are facing any hurdles in configuring your Amazon S3 bucket, connect with us, we can help.

Nisarg Satani is a Jr. DevOps Engineer at Anblicks. He is a Cloud Computing and DevOps enthusiast and is a keen learner. He believes that Cloud brings the future to the present.