Skip links

A Step-by-Step Process to Connect Azure Data Factory (ADF) with Azure DevOps

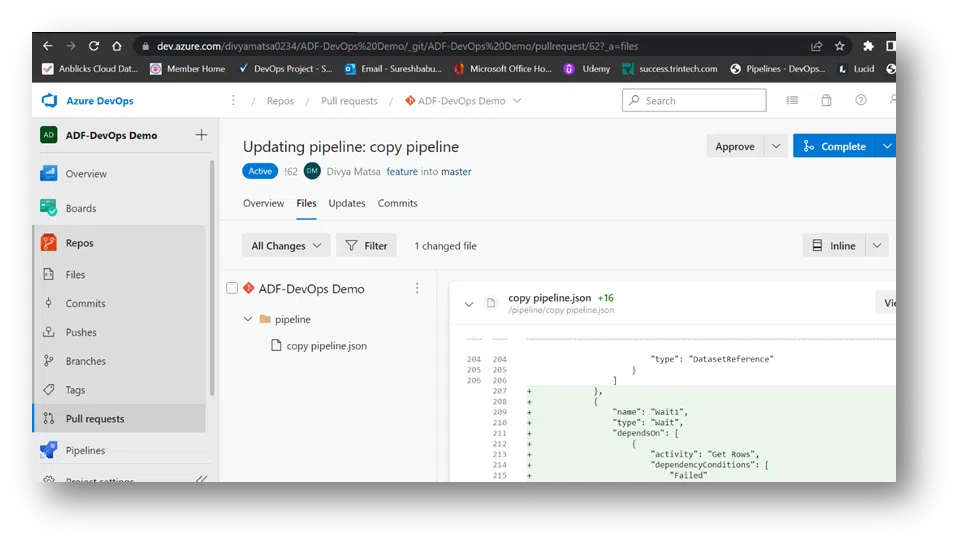
There has been a lot of buzz lately about Azure DevOps. Are you using Azure DevOps? Do you want to know the benefit of using Azure-enabled DevOps (or any code repository) in preserving code? This blog will show you how to connect an existing ADF project to Azure DevOps CI CD workflows.

In the ADF ecosystem, the data integration service helps to provide support to develop and orchestrate data-driven workflows. It uses JSON to capture the code in the data factory by connecting ADF to the code repository. This will track every change. When a coder publishes the code, DevOps will establish a new version of Data Factory, where the code will be roll-back if required.

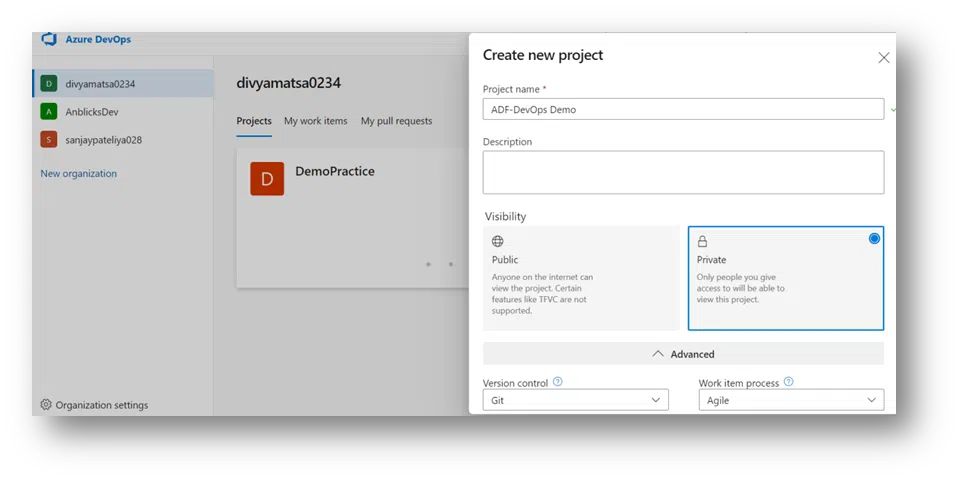
The following steps will help the engineer(user) to connect the azure data factory (ADF) to Azure DevOps:

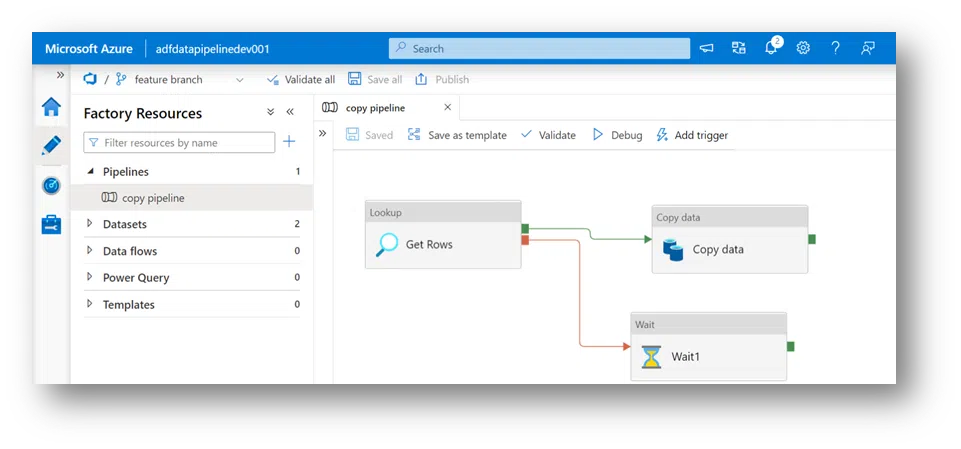
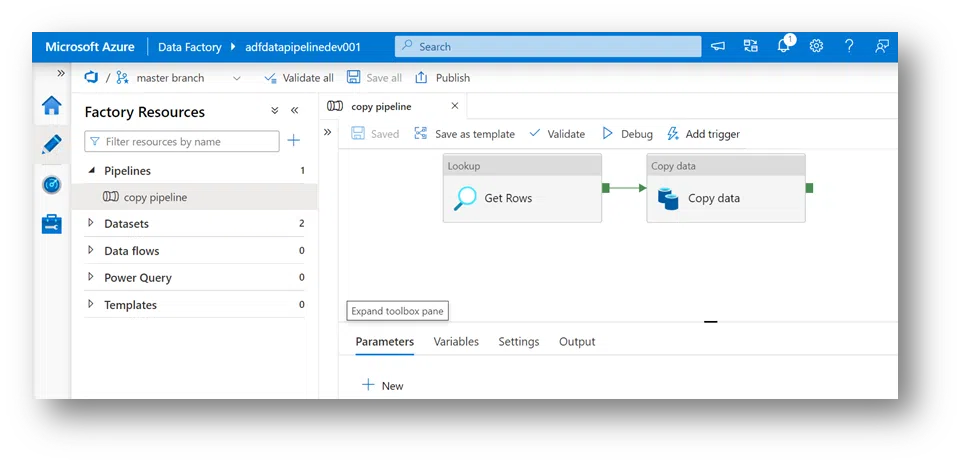
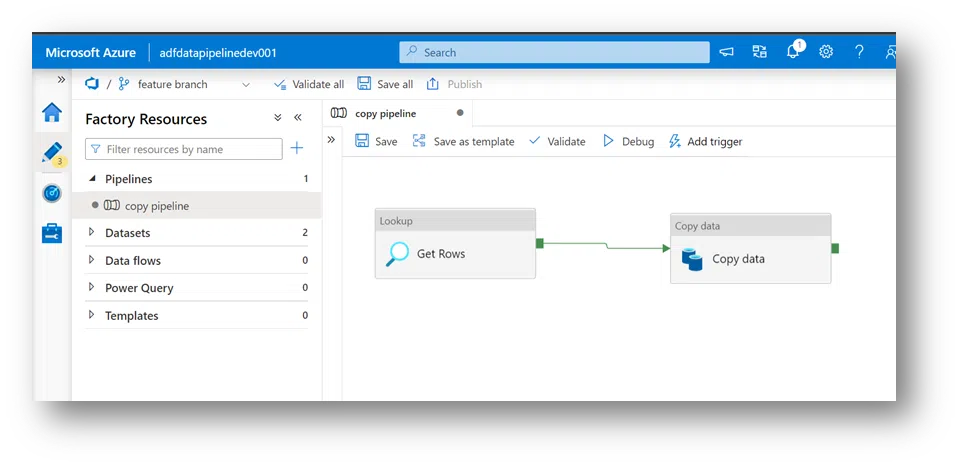
1. Create a simple Data Factory “adfdatapipelinedev001” that lookup the data in the storage account folder and copies data from Azure Data Lake Storage to an Azure Storage Blob.

2. ADF supports two versions of a code repository: Azure DevOps and GitHub. Let’s work on Azure DevOps under Git Configuration.

Related Blog: Azure Data Factory- A Contemporary Solution for Modern Data Integration Challenges
Learn more
3. Firstly, login into Azure DevOps (dev.azure.com), then create a New Project by filling in details like project name, description, and visibility. Then, go to the Advanced section and change your version control and work item process into Agile.

4. After creating a project, go to Data Factory. In the upper left corner, named “Data Factory,” and shows some drop-down options, click on Set Up Code Repository.

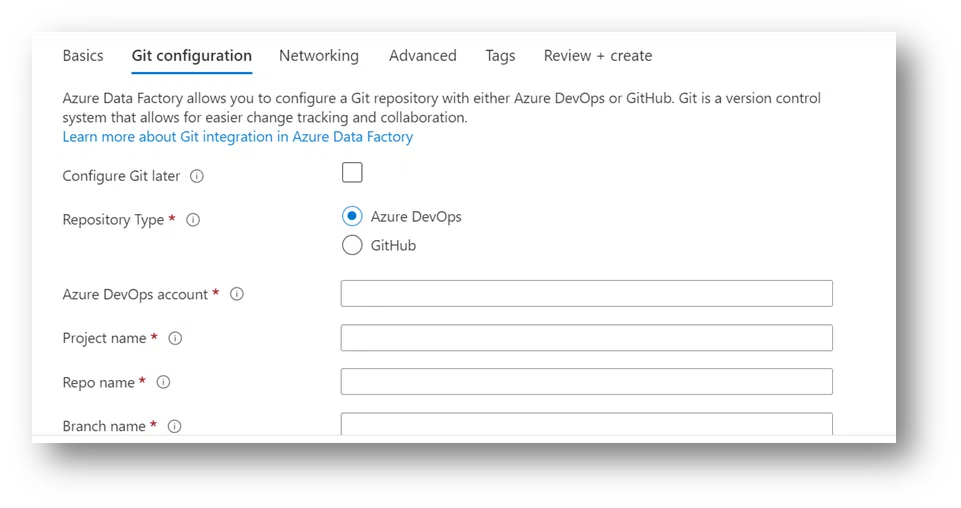
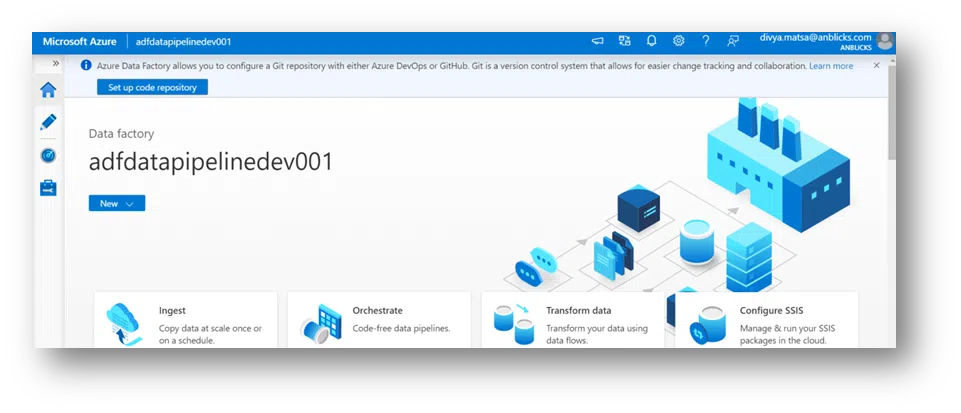
5. After clicking on Set Up Code Repository, this will open Repository Settings, were set up the connection to the code repository was created in the 3rd step. Then,

  • Select Repository Type: Azure DevOps Git
  • Select Azure DevOps account, which is associated with a user account.
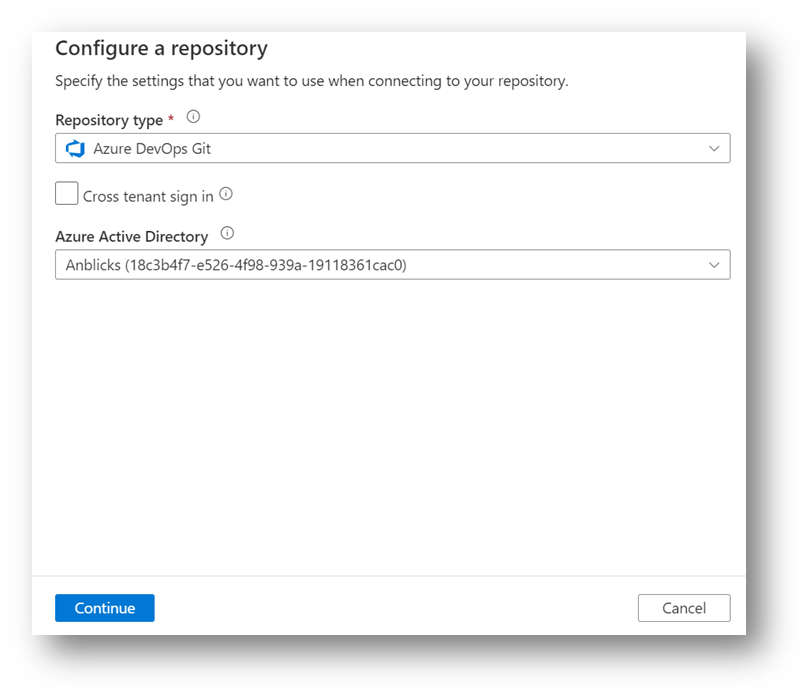
  • Then click Save.
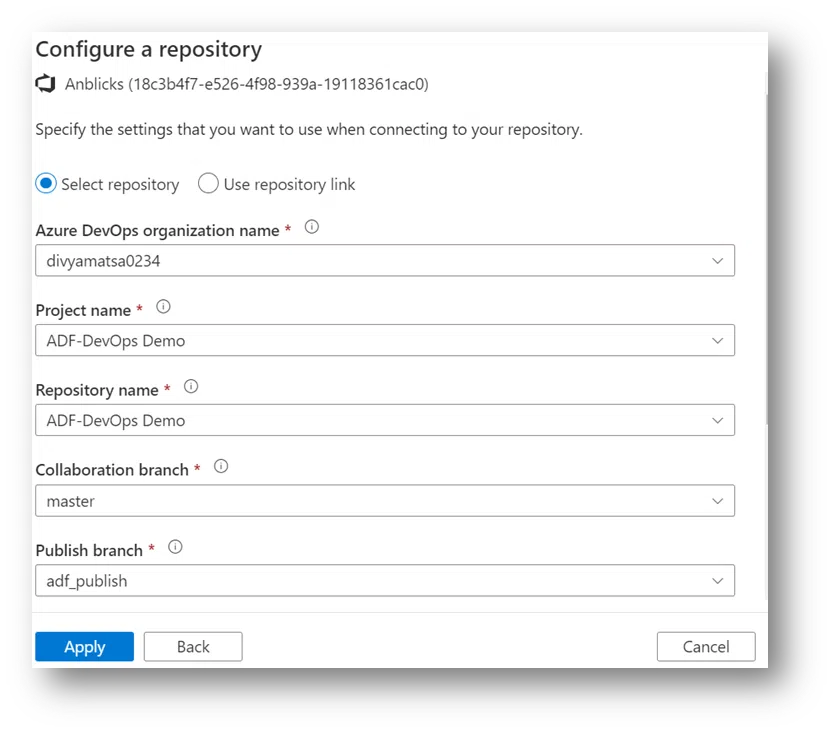
  • Then, configure a repository:
    • Choose Project Name (the one we just created)
    • Git Repository Name: We can create a new one or use the existing repository when we create it.
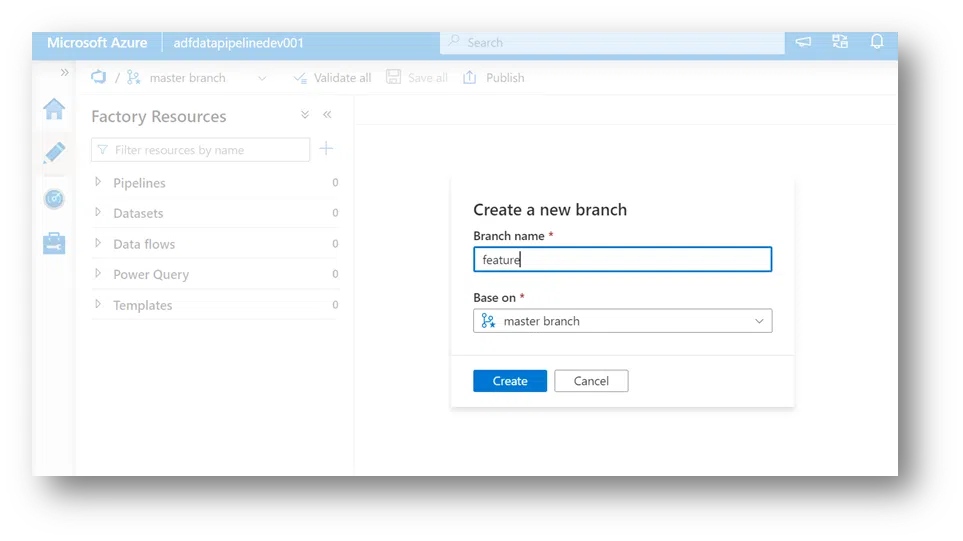
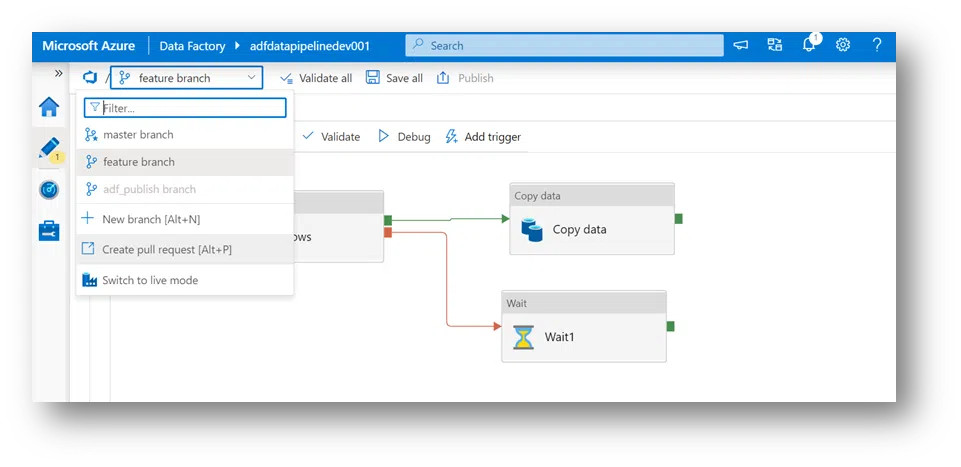
    • Collaboration Branch: I suggest you stick with Master. This is where all your branching will merge, and a copy of all the changes you’ve made will be published to the Azure Data Factory that runs via trigger or event.
    • Then click Save.
Data Sheet: Azure Data Factory Config Driven Framework
Download
6. Once a user can see their ADF page where Save as Template is grayed out, but underneath that, you’ll see two new Save buttons pop up. These buttons will allow if the saved changes the user made are different than they do and need to be done, which is to publish changes to the Data Factory.

7. Now, all configurations and code repository are Saved, Save All, and Publish Buttons. Additionally, the user will be asked what branch they want. A user can create a new one or the existing (Master) branch.

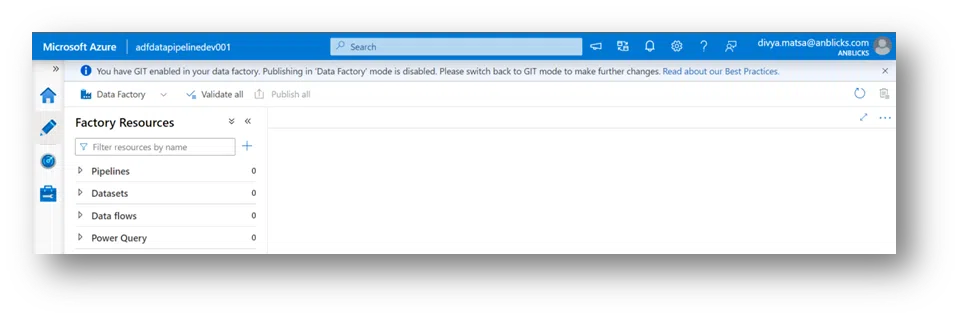
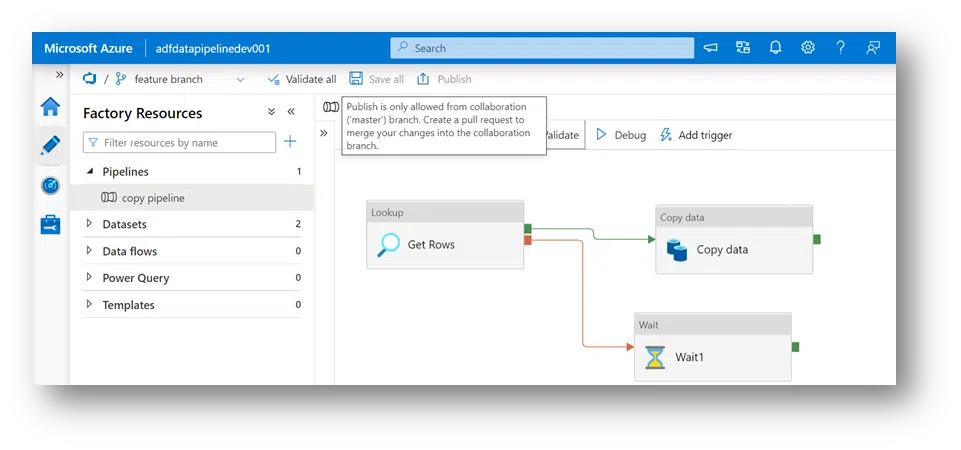
8. At the top, you’ll see the warning if a user selects ADF while working out of the master branch and Azure DevOps GIT. The warning will be “publishing Data Factory mod has been disabled” because of choosing the DevOps GIT as a branch in this case.

9. The next step is to create a new branch, as shown in the below image. Try to use the name in such a way that differentiates when working in a team.

10. In pipeline, users will add a wait command to see how the change gets captured. In Get Rows, you need to choose to make this wait happen when the failure occurs, then connect the failure to the wait and save it.

11. After creating branch and command, a user will hit publish and receive an error message that says ‘publish is only allowed from collaboration (Master) branch. Merge the changes to Master.’

Related Blog: Why is Azure DevOps Automation important in AI systems?
Read more
12. To merge changes to the main branch, go up in the header section, and change the feature branch to the master branch. But when the user changes it, the wait command disappears, and where wait needs to occur.
13. To execute and fix the wait command, the user moves back to the branch at the top and selects Create Pull Request from the drop-down options. This will pull that branch back into the collaboration (Master) branch.
14. After pulling back the master branch, set up the pull request from the feature into the master branch and click Create, and it will pop up to either approve or complete the pull request and merge.

15. Lastly, back in Data Factory, save all, and see that wait command come back into the master branch.

Conclusion:

This is how we can connect ADF to Azure DevOps that can handle easy Migration of ETL Workloads to the Cloud. At Anblicks, we provide Azure services on the cloud across multiple industries, from consulting and implementation to ensuring high-quality business processes and operations. Connect with us to know more about our Azure-based cloud data analytics services.
This website uses cookies to improve your web experience.